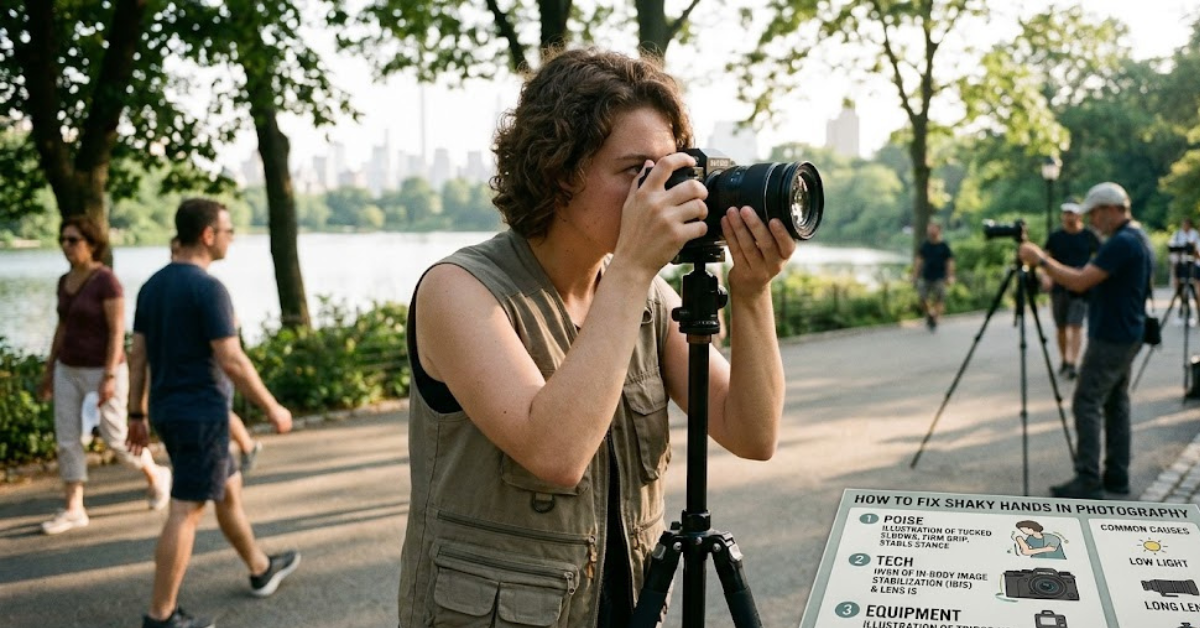
If your photos keep coming out blurry, you’re not alone. Hand shake is one of the most common issues photographers face, especially beginners. The good news is that learning how to fix shaky hands photography doesn’t require expensive gear—just a few smart techniques and camera habits.
In this guide, we’ll break down practical, real-world solutions that help you capture sharp, steady images whether you’re shooting with a phone or a DSLR.
Why Shaky Hands Affect Your Photos
Before fixing the problem, it helps to understand it. Camera shake happens when your hands move slightly while the shutter is open. Even a tiny movement can blur the final image, especially in low light or slow shutter speeds.
Understanding how to fix shaky hands photography starts with knowing when blur is most likely:
- Low-light environments
- Slow shutter speed settings
- Zoomed-in shots
- Long exposure photography
How to Fix Shaky Hands Photography with Proper Grip
One of the simplest solutions is improving how you hold your camera. A stable grip makes a huge difference.
Try this technique:
- Hold the camera with both hands
- Keep elbows close to your body
- Use your left hand as a support base under the lens
- Stand with feet shoulder-width apart
This basic foundation is often the first step in how to fix shaky hands photography effectively.
Use the Right Shutter Speed
Shutter speed plays a major role in sharp images. The slower it is, the more likely you’ll get blur from hand movement.
Rule of thumb:
- Use shutter speed at least 1/focal length
(Example: 50mm lens → 1/50 sec or faster)
Increasing shutter speed is one of the most reliable methods for how to fix shaky hands photography in real shooting conditions.
Enable Image Stabilization (IS/VR/OIS)
Most modern cameras and smartphones come with built-in stabilization.
Types of stabilization:
- Optical Image Stabilization (OIS)
- In-Body Image Stabilization (IBIS)
- Lens-based stabilization (VR/IS)
Turn it on whenever possible. It helps reduce small movements and is a key part of how to fix shaky hands photography without changing your shooting style.
Use Proper Breathing and Shooting Technique
It sounds simple, but breathing control can improve sharpness more than you think.
Try this:
- Take a deep breath
- Exhale slowly
- Press the shutter halfway, then gently capture
This reduces sudden movement and improves control, especially in handheld shooting situations.
Stabilize Your Body, Not Just the Camera
Many people focus only on their hands, but your whole body matters.
Stability tips:
- Lean against a wall or solid surface
- Sit down for extra support
- Kneel when shooting at low angles
These habits are practical steps in learning how to fix shaky hands photography in real-world environments.
Use a Tripod or Monopod
Sometimes, the best solution is removing hand shake entirely.
When to use support:
- Night photography
- Long exposure shots
- Zoomed-in wildlife or sports photography
- Low-light indoor scenes
Even a lightweight tripod can dramatically improve sharpness and consistency.
Increase ISO When Necessary
Low ISO means slower shutter speed, which increases shake risk. Raising ISO allows faster shutter speeds.
Balance tips:
- ISO 100–400 for daylight
- ISO 800–1600 for indoor or low light
- Higher ISO for night shooting (depending on camera quality)
This adjustment is often overlooked in how to fix shaky hands photography but is extremely effective.
Use Burst Mode for Better Chances
Burst mode takes multiple shots in quick succession. Even if your hands shake slightly, one frame is likely to be sharp.
Benefits:
- Higher chance of a sharp image
- Great for action shots
- Useful for beginners
It’s a simple but powerful trick when learning how to fix shaky hands photography.
Avoid Over-Zooming
Zooming amplifies hand movement. The more you zoom, the harder it becomes to stay steady.
Better approach:
- Move closer instead of zooming
- Use wide-angle when possible
- Crop later in editing instead of in-camera zoom
This small change improves stability instantly.
Practice the “Wall Support” Method
One underrated trick is using your environment for support.
Examples:
- Rest elbows on a table
- Lean camera against a pole
- Use a tree or wall for balance
These small adjustments help significantly when applying how to fix shaky hands photography techniques outdoors.
Frequently Asked Questions (FAQs)
1. Why are my photos blurry even when I focus properly?
Blurry photos often come from hand movement, not focus issues. This is where learning how to fix shaky hands photography becomes important.
2. Does image stabilization completely remove blur?
No, but it reduces minor shake. You still need proper technique for best results.
3. What is the best shutter speed for handheld shots?
Generally, 1 over the focal length or faster is recommended.
4. Can phone cameras also suffer from shaky hands?
Yes, especially in low light or zoom mode. Stabilization helps but doesn’t eliminate the issue completely.
5. Is a tripod necessary for beginners?
Not always, but it’s very helpful for learning stable shooting habits.
Conclusion
Mastering how to fix shaky hands photography is all about combining technique, settings, and awareness. From improving your grip and adjusting shutter speed to using stabilization tools and proper body support, small changes can dramatically improve your photo sharpness.
The more you practice these habits, the more natural they become. Over time, you’ll notice fewer blurry shots and more consistently clear, professional-looking images.